Five AtomicBod superheroes demonstrating a kettlebell squat, deadlift, overhead press, side plank, and dumbbell row
← AtomicBod home

Technique is the superpower 36 exercise guides

AtomicForm

An original superhero field guide to the major strength, core, and conditioning movements—with precise setup, execution, breathing, mistake, regression, and progression cues.

12movement categories
36exercise guides
1rule: quality first

Strong form is personal, controlled, and repeatable.

The artwork shows the featured movement patterns; the written coaching cues are the instruction. Limb lengths, mobility, injury history, equipment, and goals change what optimal form looks like for each person.

01

Stack the joints

Place the load over a stable base. Let feet, knees, hips, ribs, shoulders, and wrists line up for the movement instead of forcing one universal pose.

02

Brace + breathe

Create firm 360-degree trunk tension, then keep breathing. Challenging loads and specialized breath-holds should be coached individually.

03

Own the range

Use the deepest or longest range you can control without pain, bouncing, joint collapse, or losing a neutral, intentional trunk position.

04

Earn the load

Add resistance only after setup and tempo stay repeatable. End the set when technique changes—not several repetitions later.

Train the body you have today.

Start with a pain-free range and a load you can control. Use stable equipment, clear the training area, and use safety arms or a qualified spotter for challenging free-weight lifts.

  • Stop for sharp or escalating pain, chest pain, faintness, severe shortness of breath, new numbness, or loss of control.
  • Get clinical clearance when symptoms, recent surgery, pregnancy, cardiovascular risk, or a significant joint or spine condition makes exercise selection uncertain.
  • A qualified trainer can adapt stance, grip, range, tempo, and equipment to your body in real time.

Twelve categories. Thirty-six major exercises.

Move from foundations into cables, abdominal stability, dumbbells, kettlebells, focused arm work, and cross-training power. It is a broad starting system, not every possible exercise variation.

Squat + lunge

Train the thighs and glutes while the feet, knees, hips, and trunk share the work. Your exact stance and depth should match your anatomy and control.
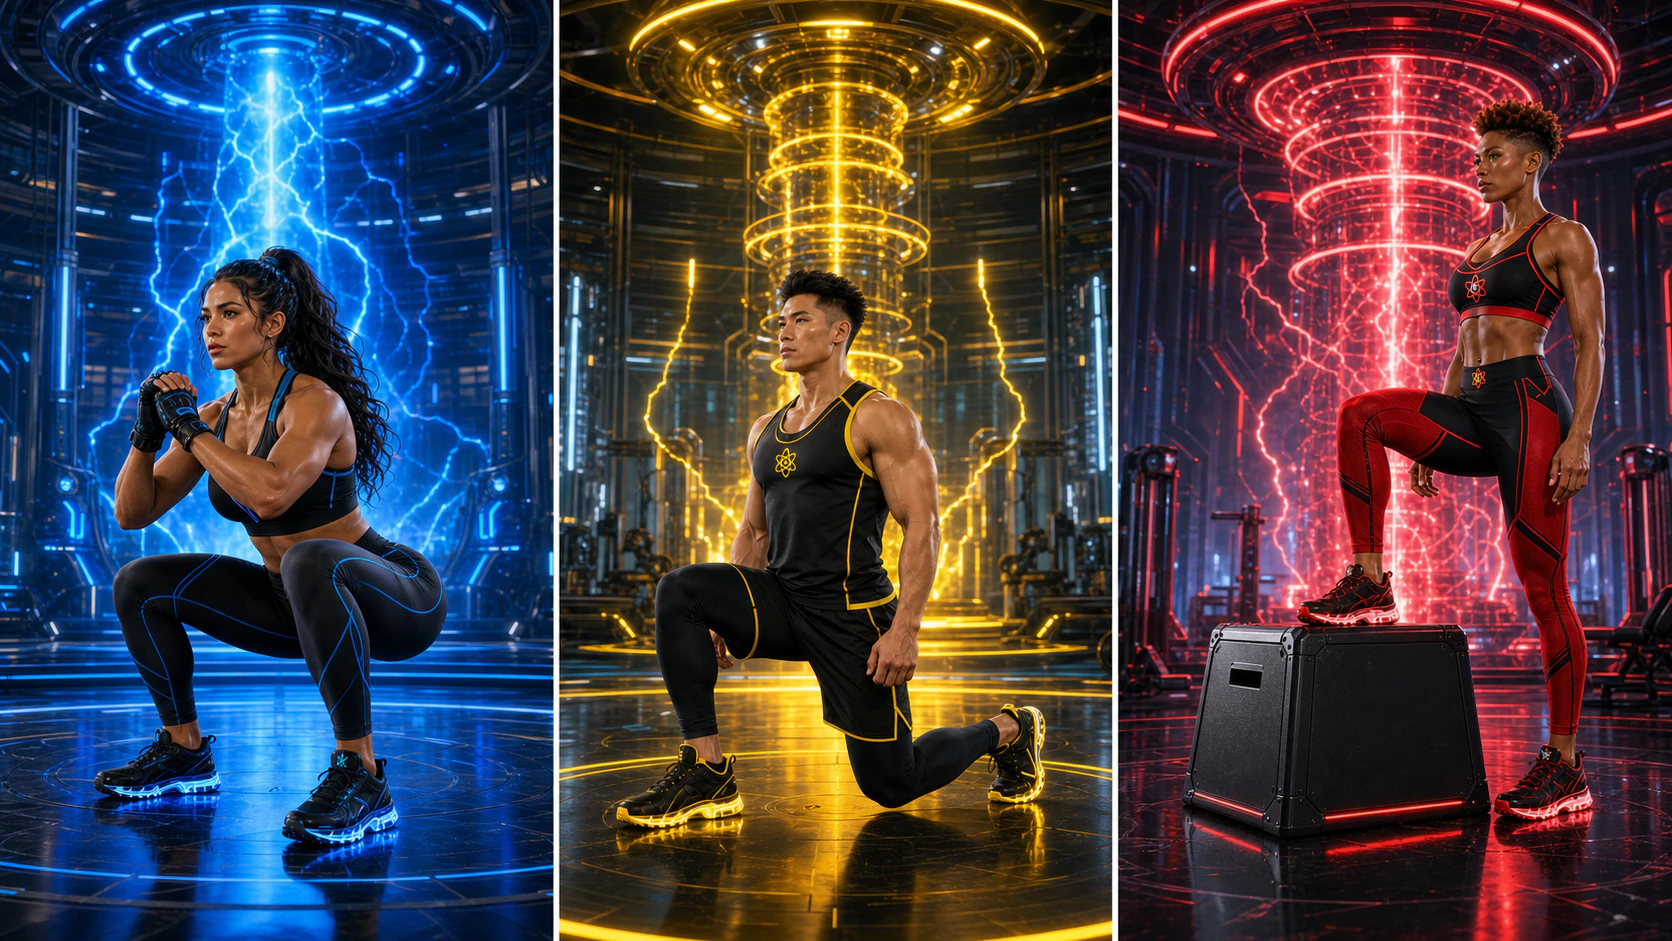
Three unique AtomicBod superheroes demonstrating a squat, reverse lunge, and step-up
Illustrated movement panelBodyweight squat · Reverse lunge · Step-up
01.1
Foundation · None

Bodyweight squat

Set
Stand about hip-to-shoulder width with the whole foot grounded. Brace gently and keep the ribs stacked over the pelvis.
Move
Sit down and slightly back as the knees bend and track in the same direction as the toes. Descend only as far as you can keep heels down and spine controlled; drive the floor away to stand.
Breathe
Inhale and brace before descending; exhale as you stand through the hardest portion.
Avoid

Heels lifting, knees collapsing inward, chest folding, or forcing a depth you cannot control.

Scale the movement +

Easier: Squat to a high box or hold a stable support.

Harder: Goblet squat, then a progressively loaded front or back squat with coaching.

01.2
Single-leg control · None

Reverse lunge

Set
Stand tall with feet under hips. Keep the front foot facing forward and take a comfortable step backward.
Move
Lower both knees while the front foot stays fully planted and the torso remains tall. Push through the front foot to return without twisting or bouncing.
Breathe
Inhale while stepping and lowering; exhale as you drive back to standing.
Avoid

A narrow tightrope stance, front knee collapsing inward, back foot turning out, or slamming the rear knee down.

Scale the movement +

Easier: Use a rail for balance or shorten the range.

Harder: Add dumbbells or use a controlled rear-foot-elevated split squat.

01.3
Stairs + power · Low stable box

Step-up

Set
Choose a box low enough to keep the lead foot fully planted and the pelvis level. Place the entire foot on the box.
Move
Lean slightly from the ankles, drive through the lead foot, and stand tall on the box. Lower slowly with the knee tracking over the middle toes.
Breathe
Exhale as you rise; inhale during the controlled descent.
Avoid

Pushing hard off the trailing foot, the lead knee diving inward, or using a box so high the pelvis tucks and rounds.

Scale the movement +

Easier: Use a shorter step and hand support.

Harder: Add a knee drive or light dumbbells without losing control.

Hinge + hip drive

A hinge sends the hips back while the spine stays long. The hamstrings and glutes create the motion; the lower back transfers force instead of repeatedly bending under load.
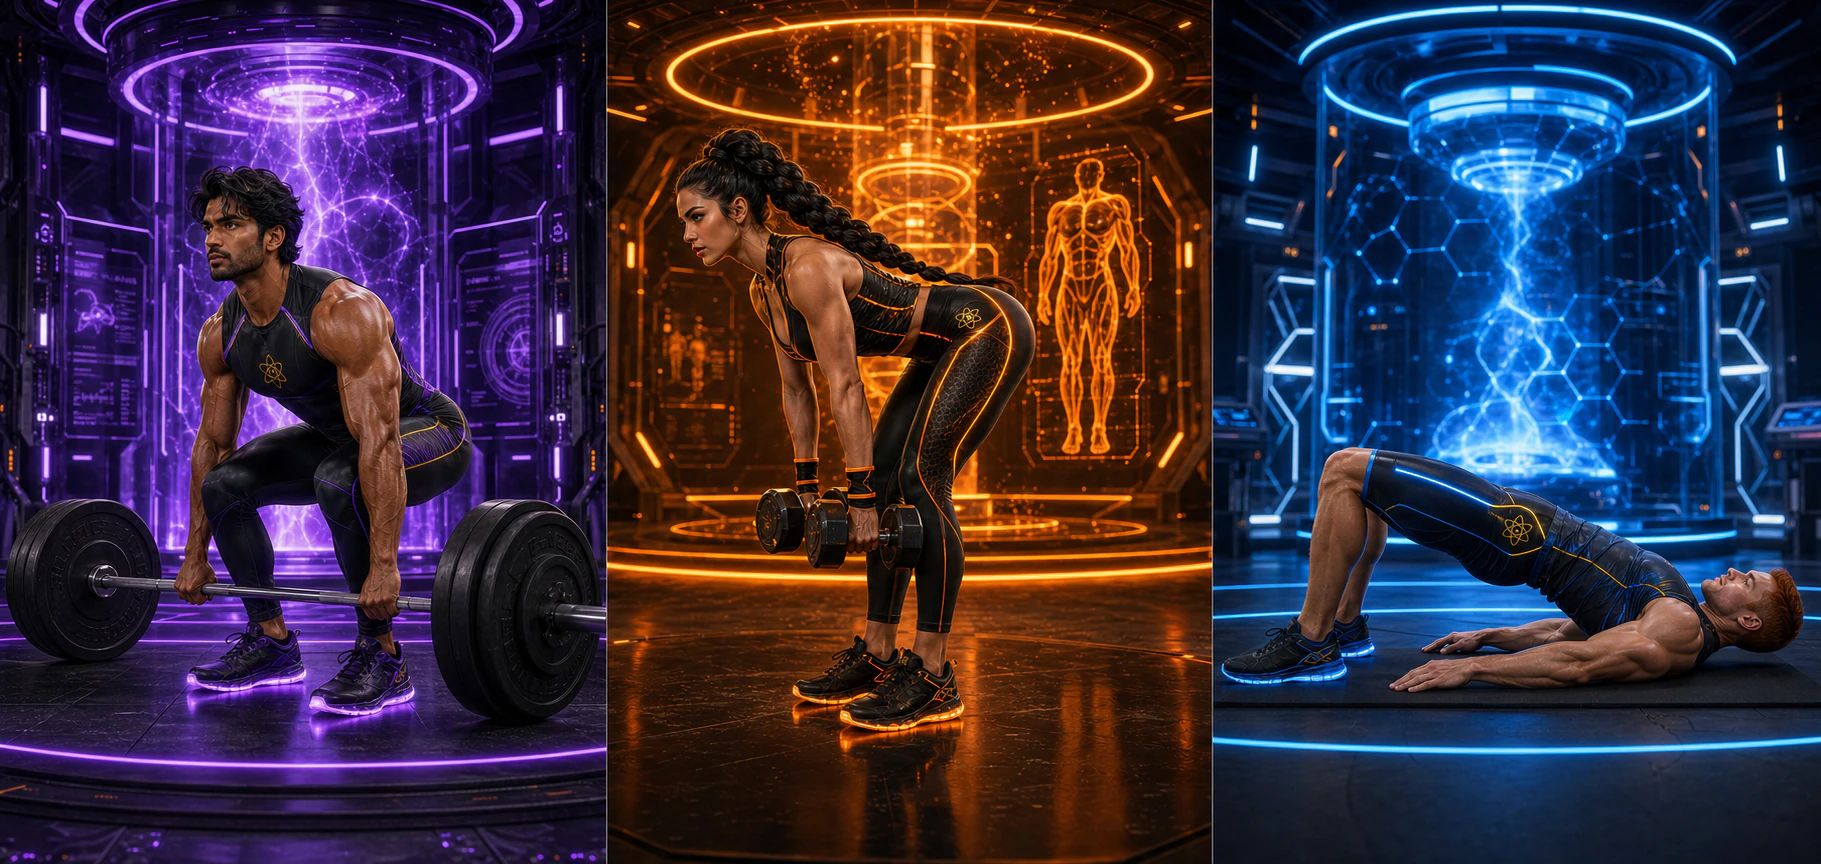
Three unique AtomicBod superheroes demonstrating a deadlift, Romanian deadlift, and glute bridge
Illustrated movement panelDeadlift · Romanian deadlift · Glute bridge
02.1
Floor-to-stand strength · Barbell

Deadlift

Set
Place the bar over midfoot. Hinge down, grip outside the legs, bring shins near the bar, brace the trunk, and set a long neutral spine with shoulders slightly in front of the bar.
Move
Push the floor away and keep the bar close as knees and hips extend together. Finish tall without leaning back; hinge, then bend the knees to return the bar under control.
Breathe
Take a 360-degree brace before the pull; exhale after passing the hardest point or once safely standing.
Avoid

Jerking the bar, rounding under load, letting the bar drift forward, hips shooting up first, or hyperextending at lockout.

Scale the movement +

Easier: Raise the bar on blocks or learn with a kettlebell deadlift.

Harder: Add load gradually only while every rep starts and ends in the same position.

02.2
Hamstrings + glutes · Dumbbells

Romanian deadlift

Set
Stand tall with weights close to the thighs, knees softly bent, shoulders set, and trunk braced.
Move
Push the hips straight back while keeping weights close and shins nearly vertical. Stop when hamstring tension or mobility limits the hinge, then drive hips forward to stand.
Breathe
Inhale and brace before hinging; exhale while standing through the effort.
Avoid

Turning it into a squat, reaching weights away from the legs, chasing the floor, rounding, or leaning backward at the top.

Scale the movement +

Easier: Practice a wall-touch hip hinge without weight.

Harder: Increase load slowly or use a single-leg supported RDL.

02.3
Hip extension · Mat

Glute bridge

Set
Lie on your back with knees bent, feet planted about hip width, and ribs gently down. Place heels where you can feel glutes more than hamstrings.
Move
Press through the whole foot and squeeze the glutes to lift until shoulders, hips, and knees form a line. Pause without arching, then lower slowly.
Breathe
Exhale while lifting and keeping ribs down; inhale as you lower.
Avoid

Overarching the lower back, pushing from the toes, knees falling inward or outward, or lifting higher after the hips are fully extended.

Scale the movement +

Easier: Use a smaller range and reset between reps.

Harder: Add a band, weight across the hips, or progress to a carefully controlled single-leg bridge.

Push

Pressing strength depends on a stable trunk and shoulder blades that move or anchor appropriately. Keep wrists stacked and choose an angle that stays pain-free.
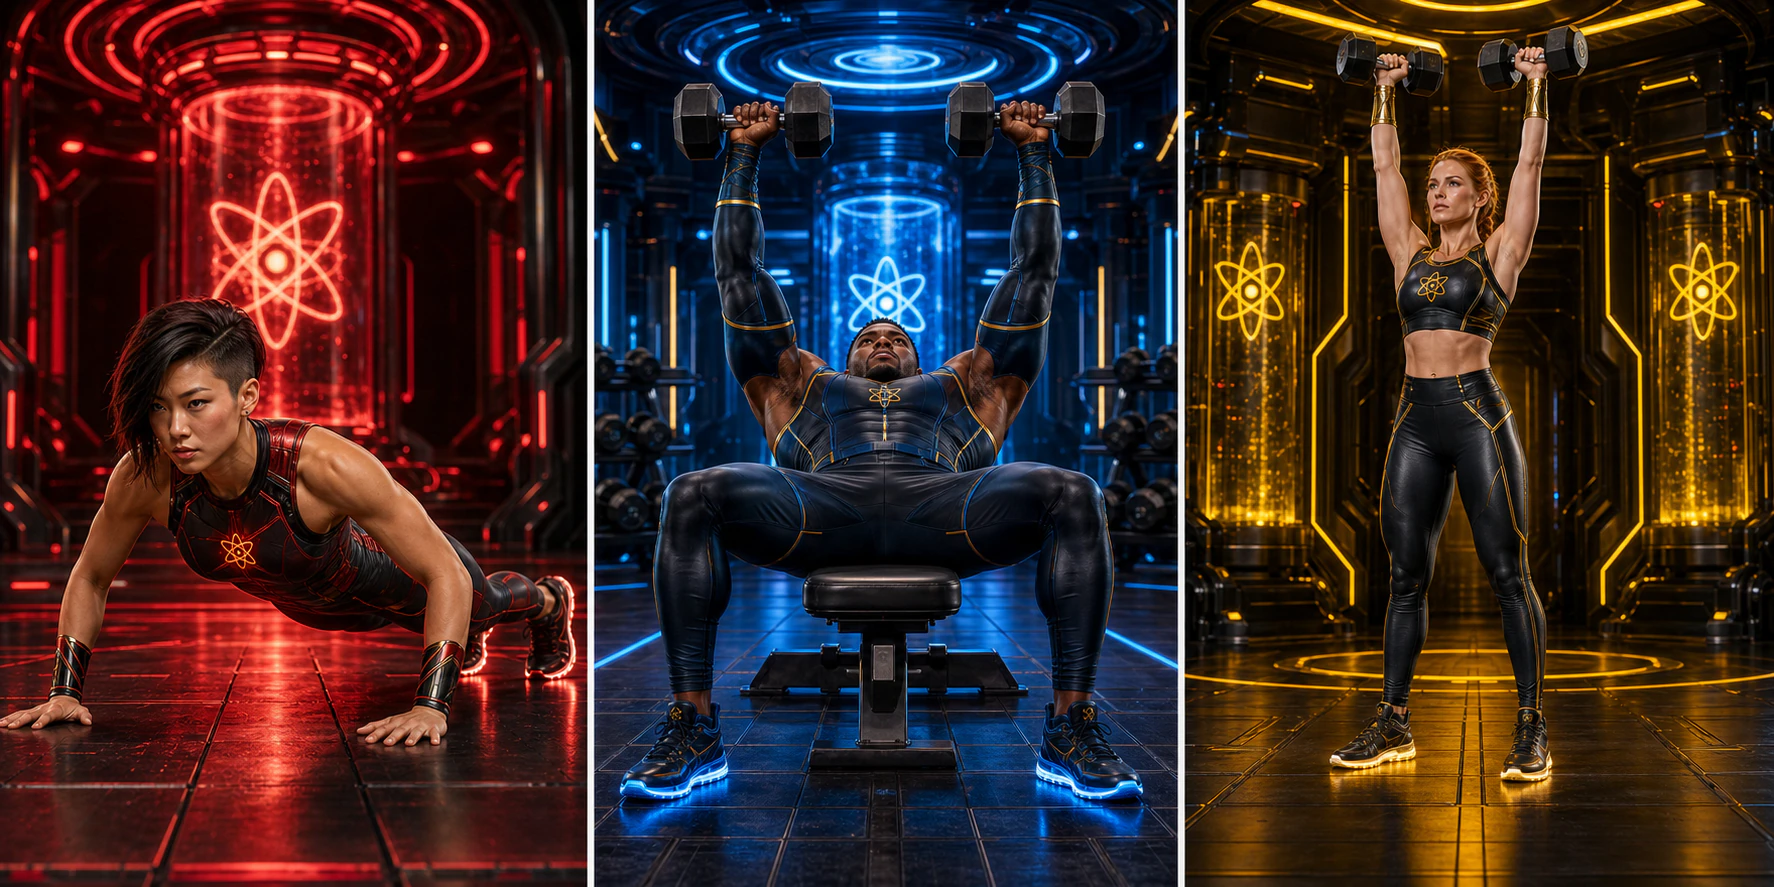
Three unique AtomicBod superheroes demonstrating a push-up, dumbbell bench press, and overhead press
Illustrated movement panelPush-up · Dumbbell bench press · Overhead press
03.1
Horizontal push · Floor or bench

Push-up

Set
Place hands just outside shoulder width and make a straight line from head through heels. Spread the fingers, press the floor, and brace glutes and abdomen.
Move
Lower the chest between the hands with elbows roughly 30–45 degrees from the torso. Keep the body moving as one unit, then push the floor away.
Breathe
Inhale on the way down; exhale as you press up without losing the brace.
Avoid

Head dropping, elbows flaring straight out, hips sagging or piking, hands far forward, or shortening range to hide lost control.

Scale the movement +

Easier: Elevate hands on a bench or wall.

Harder: Lower the hand support, add a pause, then consider external load with supervision.

03.2
Loaded horizontal push · Bench + dumbbells

Dumbbell bench press

Set
Plant both feet, lie with eyes below the weights, and set shoulder blades gently back and down. Stack wrists over elbows with a comfortable neutral-to-angled grip.
Move
Lower dumbbells toward the sides of the chest until the upper arms reach a controlled, pain-free depth. Press up and slightly inward without clanging the weights.
Breathe
Inhale and brace while lowering; exhale through the press.
Avoid

Wrists bending back, elbows flaring to 90 degrees, shoulders rolling forward, bouncing, or an exaggerated lower-back arch.

Scale the movement +

Easier: Use a chest-press machine or lighter neutral-grip floor press.

Harder: Increase load in small steps; use a spotter for challenging sets.

03.3
Vertical push · Dumbbells

Overhead press

Set
Stand with feet stable, glutes lightly braced, ribs over pelvis, and weights at shoulder height with wrists over elbows.
Move
Press the weights upward while keeping the trunk still. Allow the head to move naturally out of the path, then finish with weights stacked over shoulders before lowering slowly.
Breathe
Inhale and brace before pressing; exhale as the weights pass the hardest point.
Avoid

Leaning back, flaring ribs, shrugging early, pressing around the body, locking the knees, or forcing painful shoulder range.

Scale the movement +

Easier: Use a half-kneeling single-arm press or landmine press.

Harder: Add load gradually or alternate arms without torso rotation.

Pull

Pull with the elbows while the neck stays long and the ribs remain controlled. A stronger back should not require swinging, shrugging, or twisting through every repetition.
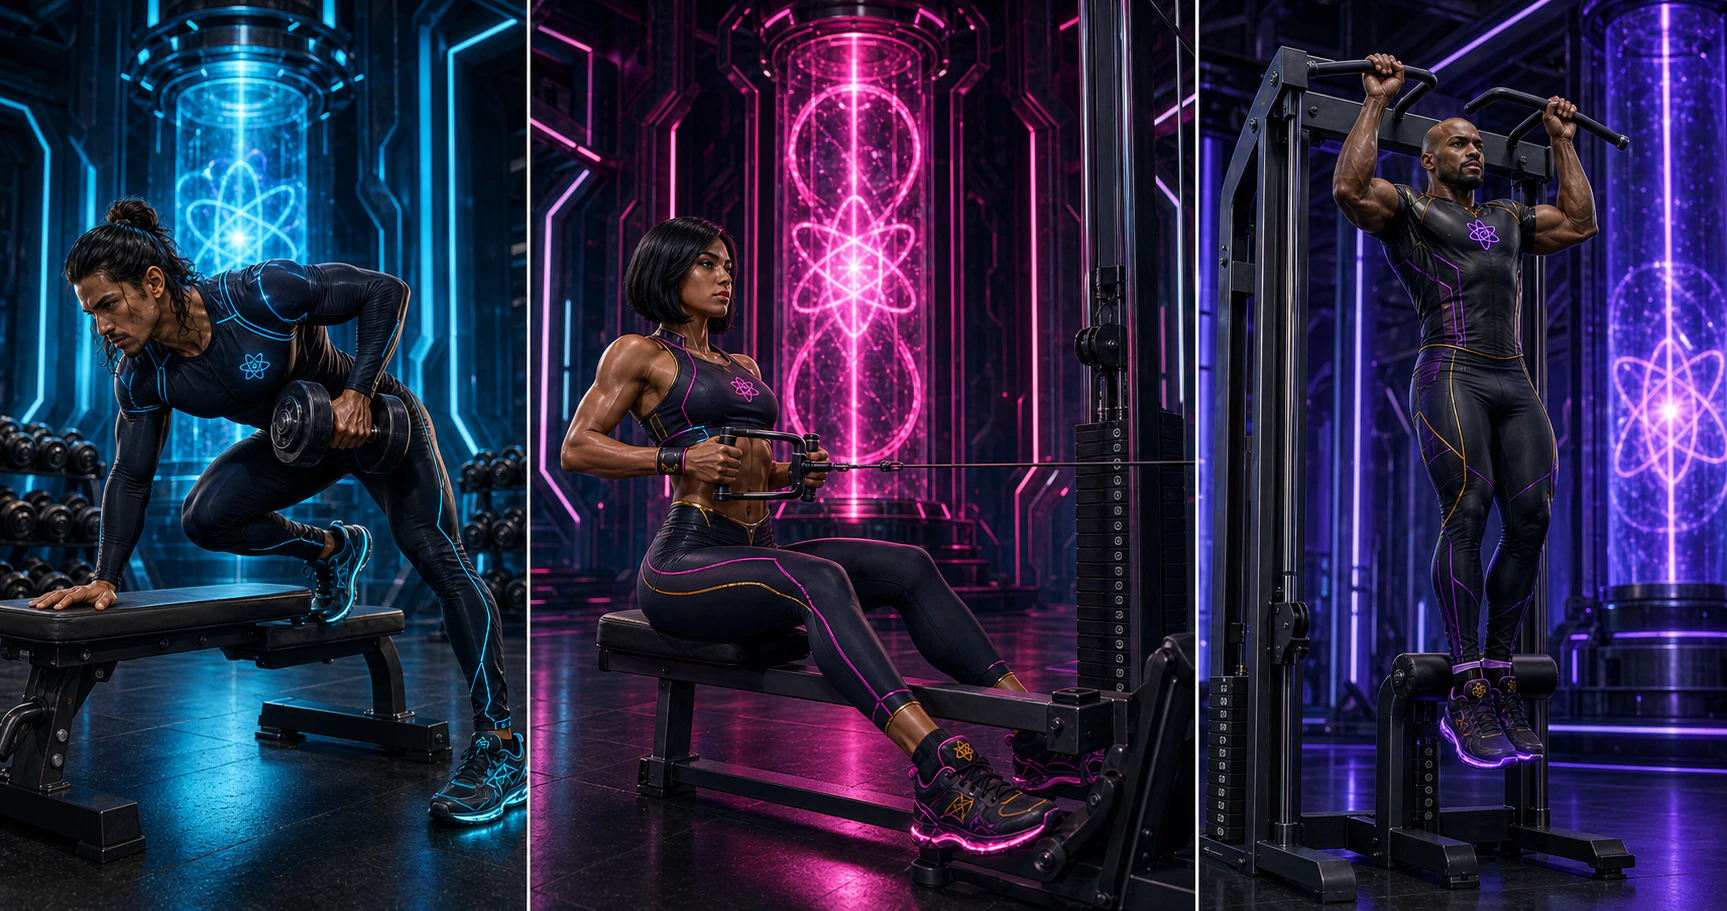
Three unique AtomicBod superheroes demonstrating a one-arm row, seated cable row, and assisted pull-up
Illustrated movement panelOne-arm dumbbell row · Seated cable row · Assisted pull-up
04.1
Supported horizontal pull · Bench + dumbbell

One-arm dumbbell row

Set
Support one hand and the same-side knee or foot on a bench. Square the hips and shoulders, brace, and let the working arm hang beneath the shoulder.
Move
Pull the elbow toward the hip while keeping the torso quiet. Pause before the shoulder rolls forward or body twists, then lower to a controlled stretch.
Breathe
Exhale as you row; inhale as the weight lowers.
Avoid

Rotating open, shrugging, yanking from the floor, bending the wrist, or pulling the elbow far past a stable shoulder position.

Scale the movement +

Easier: Use a lighter weight or chest-supported row.

Harder: Add load only while the torso remains completely still.

04.2
Horizontal pull · Cable machine

Seated cable row

Set
Sit tall with feet secure, knees soft, arms long, shoulders away from ears, and ribs stacked over the pelvis.
Move
Drive elbows back toward the ribs without leaning. Finish when the handles reach the torso and shoulder blades have moved naturally, then return slowly without collapsing forward.
Breathe
Exhale during the pull; inhale during the controlled reach.
Avoid

Rocking back and forth, shrugging, jutting the chin, bending wrists, or turning the return into a rounded-back stretch.

Scale the movement +

Easier: Use a resistance band or chest-supported machine.

Harder: Increase resistance while preserving the same torso angle.

04.3
Vertical pull · Bar + assistance

Assisted pull-up

Set
Use a band or assisted machine that lets you control the full rep. Grip comfortably, brace the trunk, and start with shoulders active rather than hanging loosely.
Move
Pull elbows down toward the ribs as the chest rises toward the bar. Keep legs quiet, pause before the shoulders shrug, then lower with control to a comfortable long-arm position.
Breathe
Exhale while pulling up; inhale while lowering.
Avoid

Kipping, craning the neck, swinging legs, shrugging, using too little assistance, or dropping through the bottom.

Scale the movement +

Easier: Use more assistance or perform a lat pulldown.

Harder: Reduce assistance gradually, then progress to strict bodyweight reps.

Core + carry

The core transfers force. These exercises train the trunk to resist extension, side-bending, and rotation while breathing and moving under control.
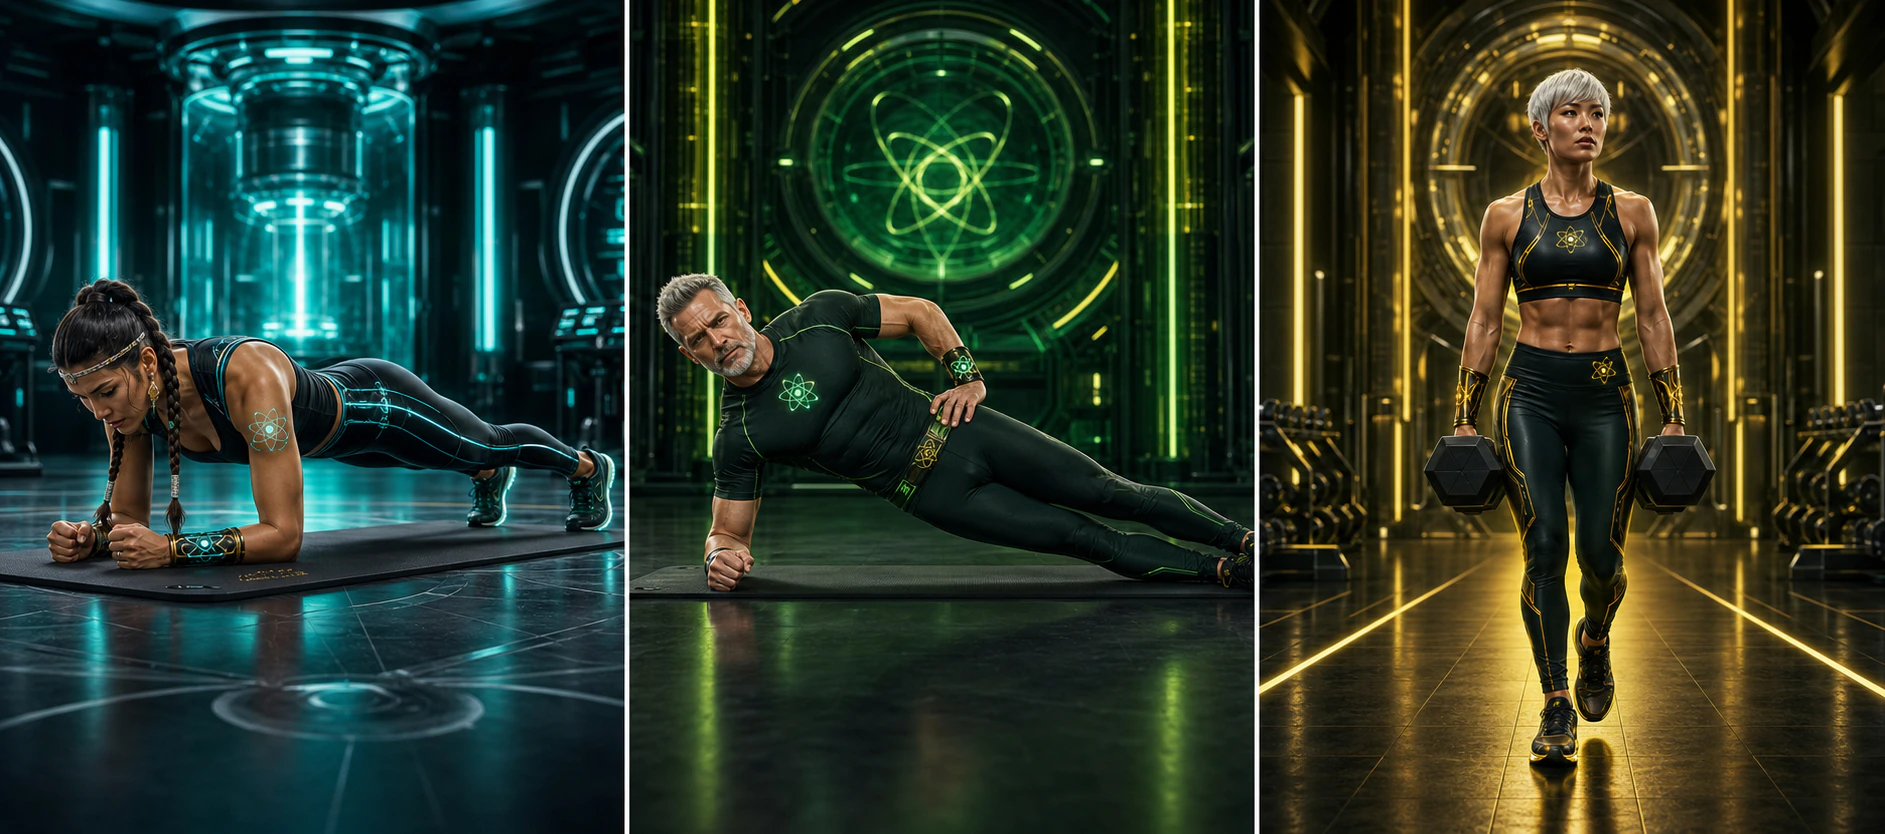
Three unique AtomicBod superheroes demonstrating a forearm plank, side plank, and farmer carry
Illustrated movement panelForearm plank · Side plank · Farmer carry
05.1
Anti-extension · Mat

Forearm plank

Set
Place elbows under shoulders and extend the legs. Make a straight line from ears through hips to heels, with glutes and abdomen braced.
Move
Push forearms into the floor, reach heels back, and hold only while you can breathe and keep ribs and pelvis stacked.
Breathe
Take quiet breaths behind the brace; end the set before breath-holding or shaking destroys position.
Avoid

Sagging or piking hips, looking forward, shoulders collapsing, clasping and pulling the hands, or chasing a long timer with poor form.

Scale the movement +

Easier: Plank from knees or elevate forearms on a bench.

Harder: Extend the lever or add a controlled shoulder tap only without trunk movement.

05.2
Anti-side-bend · Mat

Side plank

Set
Place the elbow under the shoulder, stack or stagger the feet, and align head, ribs, pelvis, knees, and ankles.
Move
Press the forearm and feet down to lift the hips. Hold a long straight line while the top shoulder and hip stay stacked.
Breathe
Breathe slowly without allowing the ribs or hips to rotate.
Avoid

Shoulder collapsing, hips drifting back, waist sagging, head dropping, or rotating toward the floor.

Scale the movement +

Easier: Bend the lower knee or elevate the forearm.

Harder: Straight-leg stack, longer holds, or a controlled top-leg lift.

05.3
Loaded locomotion · Two dumbbells

Farmer carry

Set
Stand between equal weights, hinge to pick them up, then stand tall with ribs over pelvis, shoulders down, wrists neutral, and gaze forward.
Move
Walk with short controlled steps while the weights stay quiet and the torso remains tall. Turn with several small steps; hinge to set the weights down.
Breathe
Use controlled breaths behind a firm brace; stop before posture or grip fails.
Avoid

Leaning, shrugging, rushing, weights swinging, holding breath too long, or dropping the weights.

Scale the movement +

Easier: Use lighter weights or shorter distances.

Harder: Increase load or distance separately; use suitcase carries only after mastering level posture.

Conditioning

Conditioning form should remain recognizable as fatigue rises. Adjust pace or resistance before movement quality unravels.
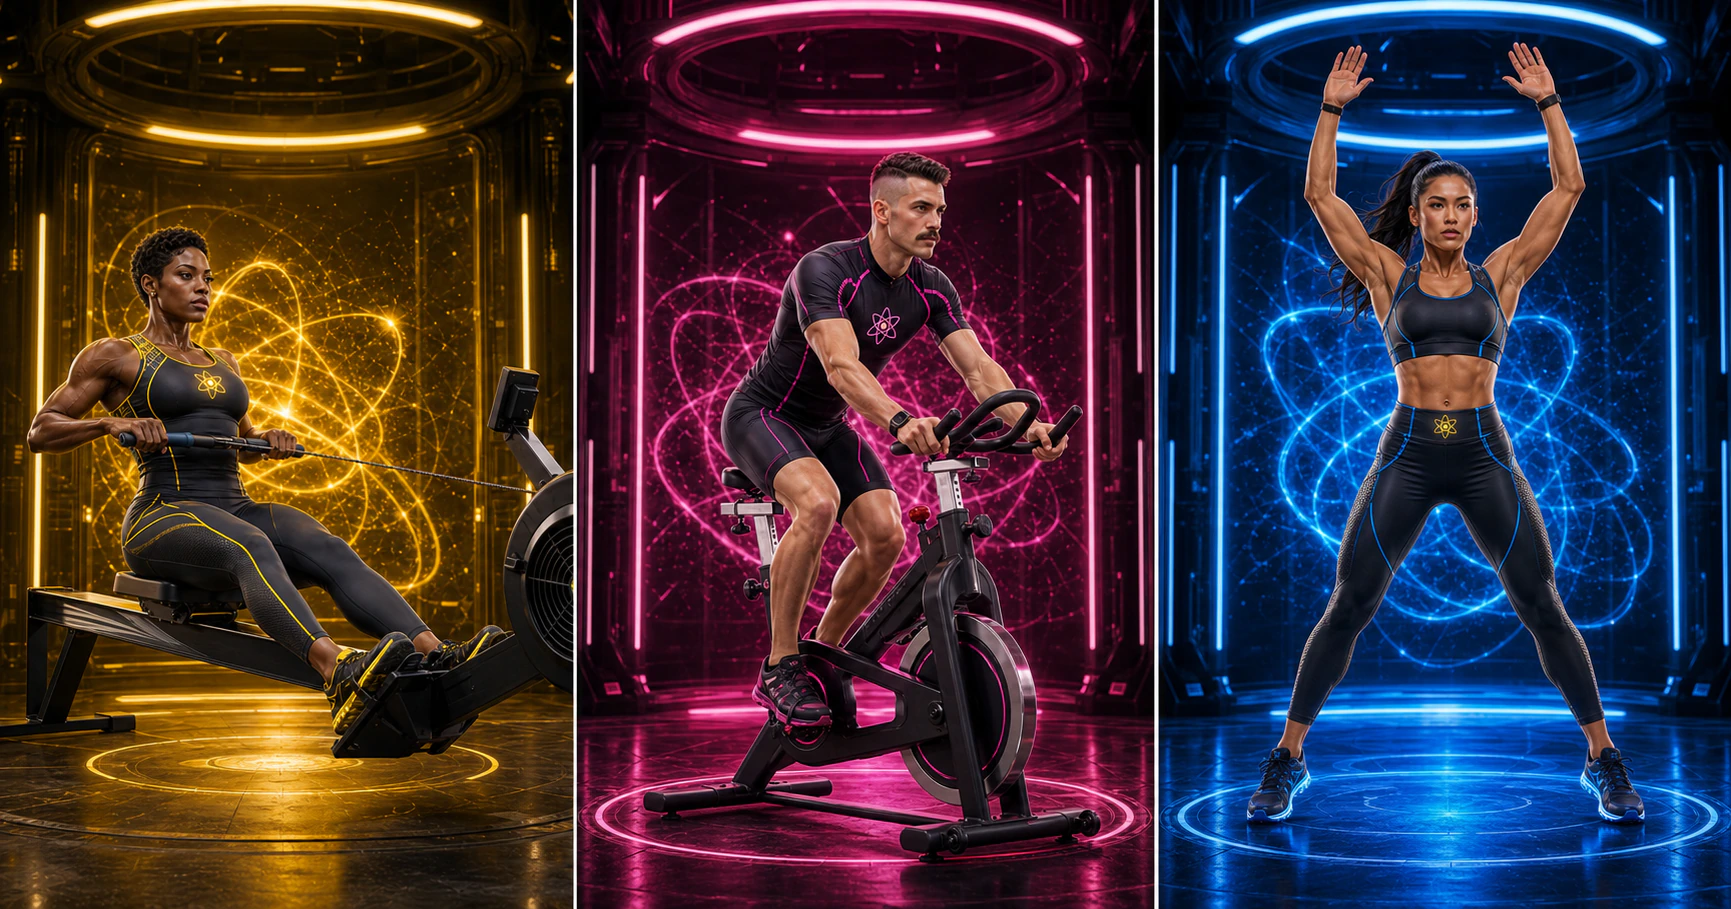
Three unique AtomicBod superheroes demonstrating rowing, stationary cycling, and jumping jacks
Illustrated movement panelRowing machine · Stationary bike · Jumping jack
06.1
Total-body conditioning · Rower

Rowing machine

Set
Strap feet securely and sit tall. At the catch, shins are near vertical, arms long, shoulders relaxed, and trunk slightly forward from the hips.
Move
Drive with the legs first, then open the hips slightly, then draw the handle toward the lower ribs. Return arms, hinge forward, then bend the knees in that order.
Breathe
Exhale through the drive and inhale during the recovery at an intensity you can control.
Avoid

Pulling with arms first, rounding heavily, opening the hips too early, handle looping over the knees, or racing the slide.

Scale the movement +

Easier: Lower resistance and row slowly in short technique intervals.

Harder: Increase pace or resistance only when the sequence stays smooth.

06.2
Low-impact conditioning · Bike

Stationary bike

Set
Set the saddle so the knee retains a slight bend at the bottom of the pedal stroke. Keep the pelvis level, hands light, and shoulders relaxed.
Move
Pedal smooth circles with knees tracking in line with the feet. Maintain a stable torso and choose resistance that prevents bouncing or grinding.
Breathe
Use steady rhythmic breathing; speech should match the intended training intensity.
Avoid

Saddle too low, knees collapsing inward, locked elbows, white-knuckle grip, hips rocking, or resistance so high cadence stalls.

Scale the movement +

Easier: Use lower resistance and shorter intervals.

Harder: Add time, cadence, or resistance one variable at a time.

06.3
Accessible impact + rhythm · None

Jumping jack

Set
Stand tall with knees soft, feet together, and arms relaxed. Clear enough space overhead and to the sides.
Move
Jump or step the feet apart while the arms travel overhead, landing softly with knees tracking over toes. Reverse smoothly to the start.
Breathe
Keep a steady rhythm and avoid breath-holding as pace rises.
Avoid

Stiff landings, knees collapsing inward, overstriding, shrugging shoulders, or continuing after coordination breaks down.

Scale the movement +

Easier: Use alternating low-impact step jacks.

Harder: Increase cadence modestly or use controlled cross jacks if joints tolerate impact.

Cable control

Cables keep tension on the body through a long path. Set the pulley, stance, and load so the torso stays stable while the intended joints create the movement.
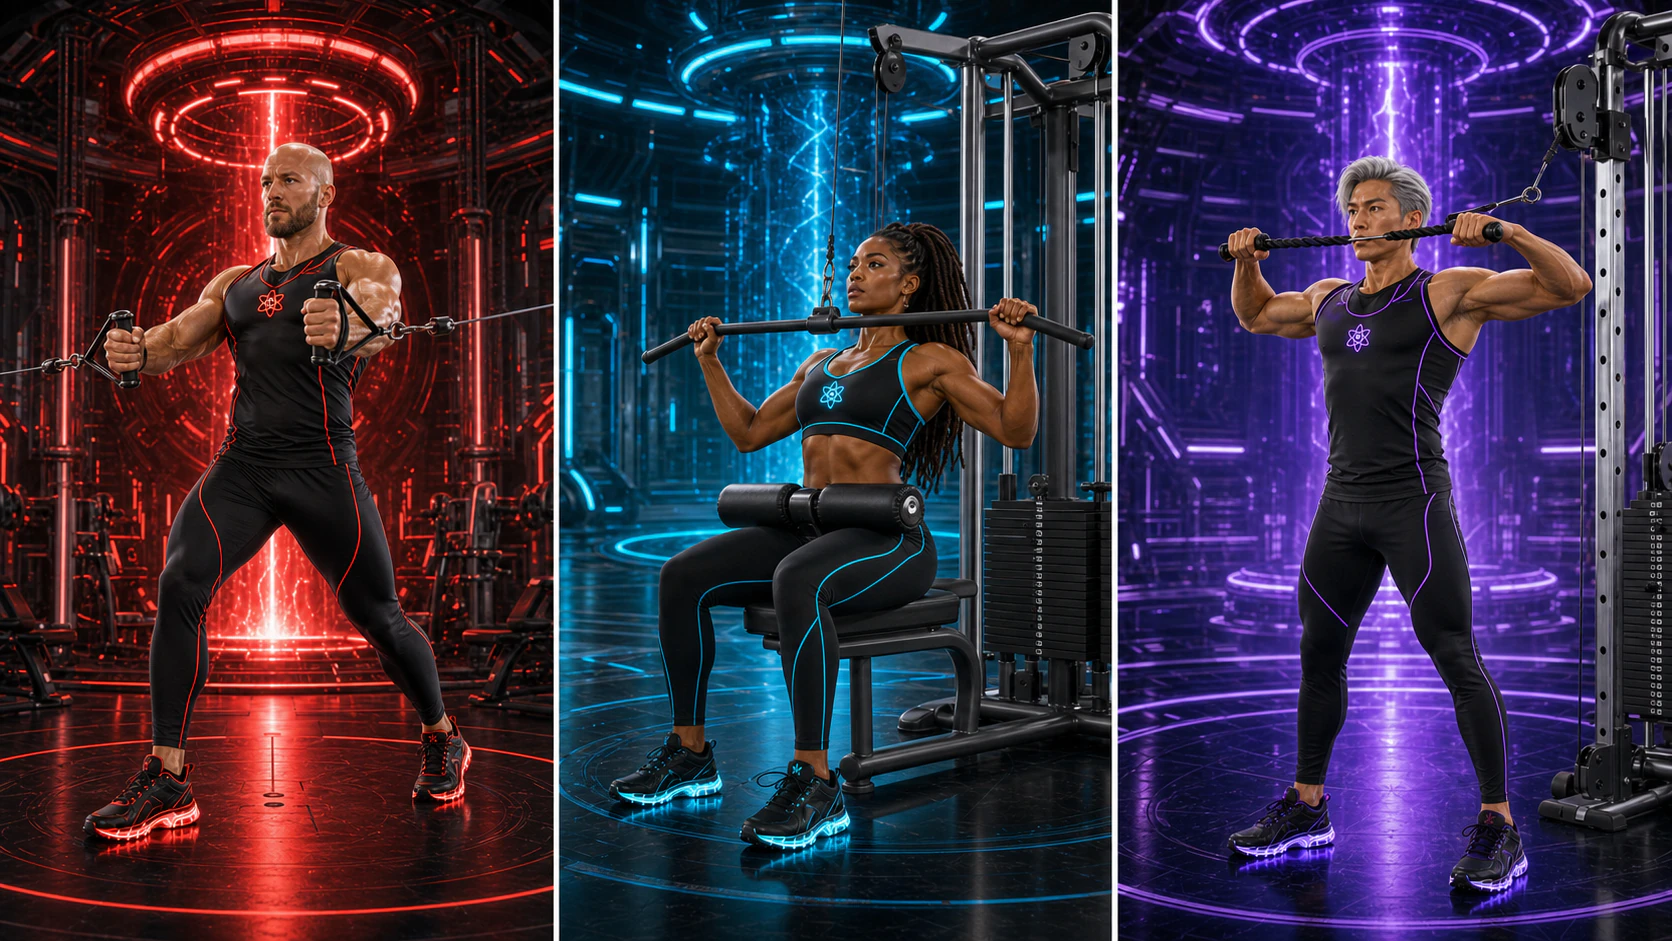
Three unique AtomicBod superheroes demonstrating a cable chest press, seated lat pulldown, and rope face pull
Illustrated movement panelStanding cable chest press · Seated lat pulldown · Rope face pull
07.1
Cable chest strength · Dual cable station

Standing cable chest press

Set
Set both handles near mid-chest height. Face away from the machine in a stable split stance, hold a handle in each hand, stack wrists over forearms, and brace with elbows slightly behind the torso only if comfortable.
Move
Press both handles forward in a smooth arc until the arms are long without locking. Keep the ribs over the pelvis, then return slowly until the chest is comfortably loaded.
Breathe
Exhale through the press; inhale during the controlled return.
Avoid

Leaning forward, flaring the ribs, bending the wrists, shrugging, letting the cables yank the arms backward, or using a stance too narrow to resist the pull.

Scale the movement +

Easier: Use less resistance or press one handle at a time with a wider stance.

Harder: Use a narrower stance or single-arm press only after you can resist torso rotation.

07.2
Vertical cable pull · Lat-pulldown machine

Seated lat pulldown

Set
Secure the thighs under the pad, brace the trunk, grip the bar comfortably outside shoulder width, and sit tall with only a small backward lean.
Move
Lower the shoulder blades, then drive the elbows toward the floor as the bar travels toward the upper chest. Stop before the elbows move behind the torso; return overhead slowly.
Breathe
Exhale as the bar comes down; inhale as the arms lengthen.
Avoid

Pulling behind the neck, rocking backward, using momentum, craning the head, shrugging, or letting the weight stack slam.

Scale the movement +

Easier: Use a neutral-grip attachment and lighter resistance.

Harder: Add resistance gradually while keeping the torso angle unchanged.

07.3
Rear shoulders + upper back · Cable + rope

Rope face pull

Set
Set the rope near eye level. Stand in a stable stance with arms long, thumbs facing one another, shoulders down, and ribs stacked.
Move
Pull the rope toward the bridge of the nose while separating the ends and guiding the elbows out. Finish with forearms roughly vertical, then return without losing posture.
Breathe
Exhale during the pull; inhale during the slow reach.
Avoid

Leaning back, shrugging, jutting the chin, pulling toward the chest, bending the wrists, or choosing a load that shortens the range.

Scale the movement +

Easier: Use a light resistance band anchored near eye level.

Harder: Pause at the finish or use a split stance with slightly more resistance.

Abs + stability

Abdominal training is not only spinal flexion. These drills teach the trunk to resist extension and rotation while the arms and legs move independently.
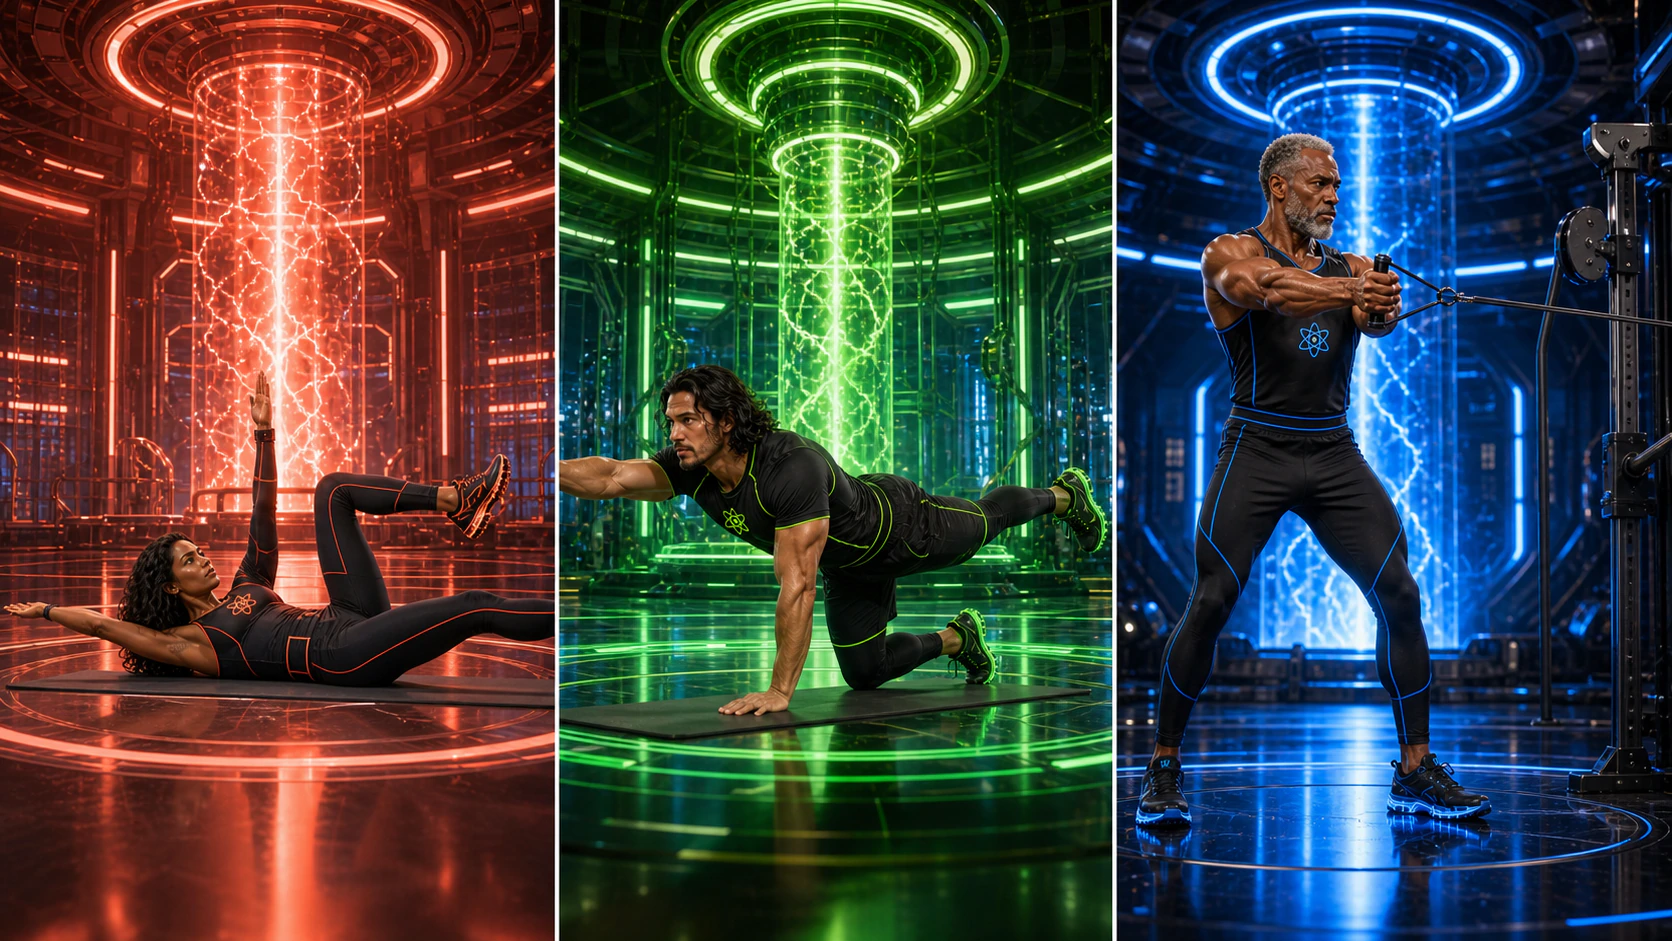
Three unique AtomicBod superheroes demonstrating a dead bug, bird dog, and Pallof press
Illustrated movement panelDead bug · Bird dog · Pallof press
08.1
Anti-extension · Mat

Dead bug

Set
Lie on your back with hips and knees at 90 degrees and arms reaching toward the ceiling. Exhale gently to stack the ribs and pelvis while keeping the neck relaxed.
Move
Slowly lower one arm and the opposite leg without letting the lower back arch or ribs flare. Return to center and alternate sides with equal control.
Breathe
Exhale as the limbs extend; inhale as they return without releasing the brace.
Avoid

Rushing, holding the breath, arching the back, straightening the leg lower than you can control, or pressing the head into the floor.

Scale the movement +

Easier: Tap one heel at a time while the arms stay vertical.

Harder: Lengthen the lever, add a light resistance band, or pause just above the floor.

08.2
Cross-body stability · Mat

Bird dog

Set
Begin on hands and knees with wrists under shoulders, knees under hips, spine long, and gaze toward the floor.
Move
Reach one arm forward and the opposite leg backward without shifting or rotating the pelvis. Pause, return softly, and change sides.
Breathe
Exhale during the reach; inhale while returning to the square starting position.
Avoid

Arching the lower back, opening the hip, lifting the limbs too high, bending the support elbow, or rushing between sides.

Scale the movement +

Easier: Move only one limb at a time or slide the foot along the floor.

Harder: Add a longer pause or draw the elbow and knee together without rounding aggressively.

08.3
Anti-rotation · Cable or band

Pallof press

Set
Stand sideways to a chest-height cable in an athletic stance. Hold the handle at the sternum with both hands and step away until light tension tries to rotate you.
Move
Press the hands straight away from the chest while keeping shoulders and hips square. Pause, return the handle, and repeat before changing sides.
Breathe
Exhale as the arms extend; inhale as the handle returns.
Avoid

Twisting toward the machine, leaning away, locking the knees, shrugging, or allowing the cable to pull the hands off center.

Scale the movement +

Easier: Use less tension, a wider stance, or a half-kneeling position.

Harder: Use a narrower stance, longer pause, or controlled overhead arc.

Dumbbell lab

Independent weights expose side-to-side differences and demand control from the hands through the trunk. Match the bench angle and load to a pain-free range.
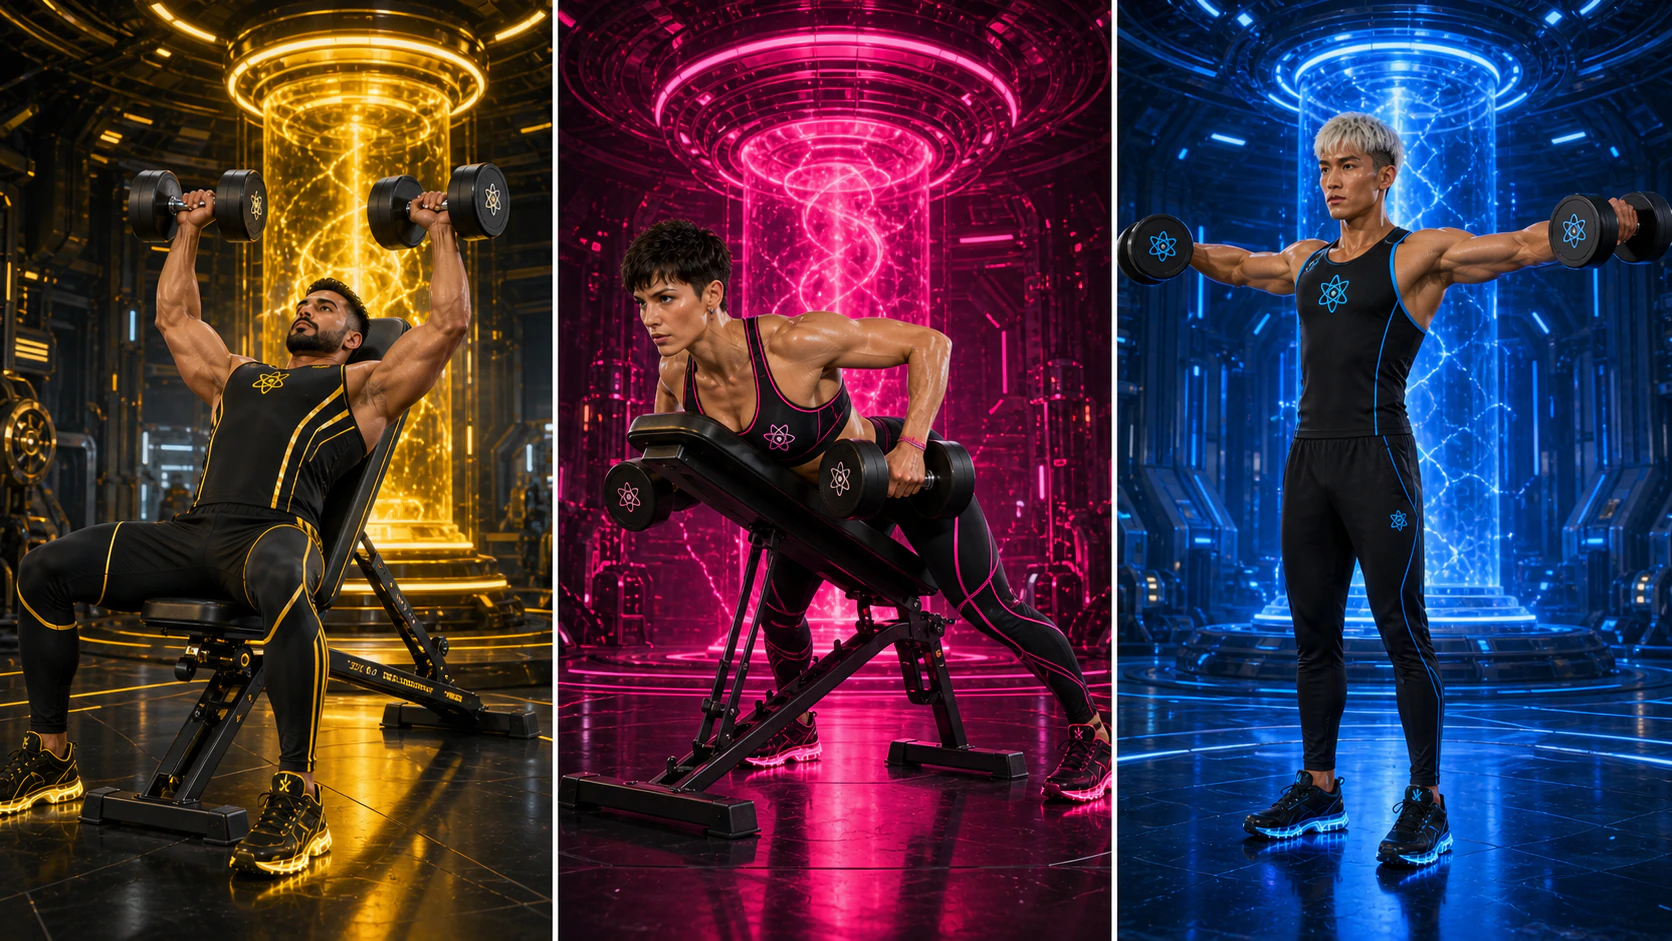
Three unique AtomicBod superheroes demonstrating an incline dumbbell press, chest-supported dumbbell row, and lateral raise
Illustrated movement panelIncline dumbbell press · Chest-supported dumbbell row · Dumbbell lateral raise
09.1
Upper-chest push · Incline bench + dumbbells

Incline dumbbell press

Set
Set the bench to a modest incline. Plant both feet, keep the head and torso supported, set the shoulder blades gently down and back, and stack neutral wrists over elbows.
Move
Lower the dumbbells toward the upper sides of the chest with elbows at a comfortable angle. Press upward and slightly inward without clanging the weights or lifting the shoulders.
Breathe
Inhale during the descent; exhale through the press.
Avoid

A very steep bench, wrists bent backward, elbows flared straight out, shoulders rolling forward, bouncing, or an exaggerated back arch.

Scale the movement +

Easier: Use a lower incline and lighter neutral-grip dumbbells.

Harder: Add load gradually or alternate arms while the torso stays still.

09.2
Upper-back pull · Incline bench + dumbbells

Chest-supported dumbbell row

Set
Lie chest-down on a low incline bench with feet secure, arms hanging naturally, neck long, and shoulder blades relaxed away from the ears.
Move
Pull both elbows toward the ribs without lifting the chest from the pad. Pause before the shoulders roll forward, then lower the weights under control.
Breathe
Exhale while rowing; inhale as the arms lengthen.
Avoid

Shrugging, craning the neck, bouncing off the pad, swinging the weights, bending the wrists, or pulling beyond a stable shoulder position.

Scale the movement +

Easier: Use lighter weights or row one arm at a time.

Harder: Add a pause at the top before increasing load.

09.3
Shoulder control · Dumbbells

Dumbbell lateral raise

Set
Stand tall with knees soft, light dumbbells beside the thighs, elbows slightly bent, shoulders down, and ribs stacked over the pelvis.
Move
Raise the arms out and slightly forward until around shoulder height or a pain-free limit. Lead with the elbows and lower slowly without swinging.
Breathe
Exhale while raising; inhale during the controlled descent.
Avoid

Shrugging, throwing the weights, leaning backward, turning the movement into an upright row, or lifting through shoulder pain.

Scale the movement +

Easier: Use one arm at a time with hand support or lighter weights.

Harder: Add a pause at shoulder height before adding load.

Kettlebell power

The kettlebell rewards a strong hinge, connected trunk, and disciplined grip. Learn the deadlift before adding speed, and keep overhead work controlled rather than rushed.
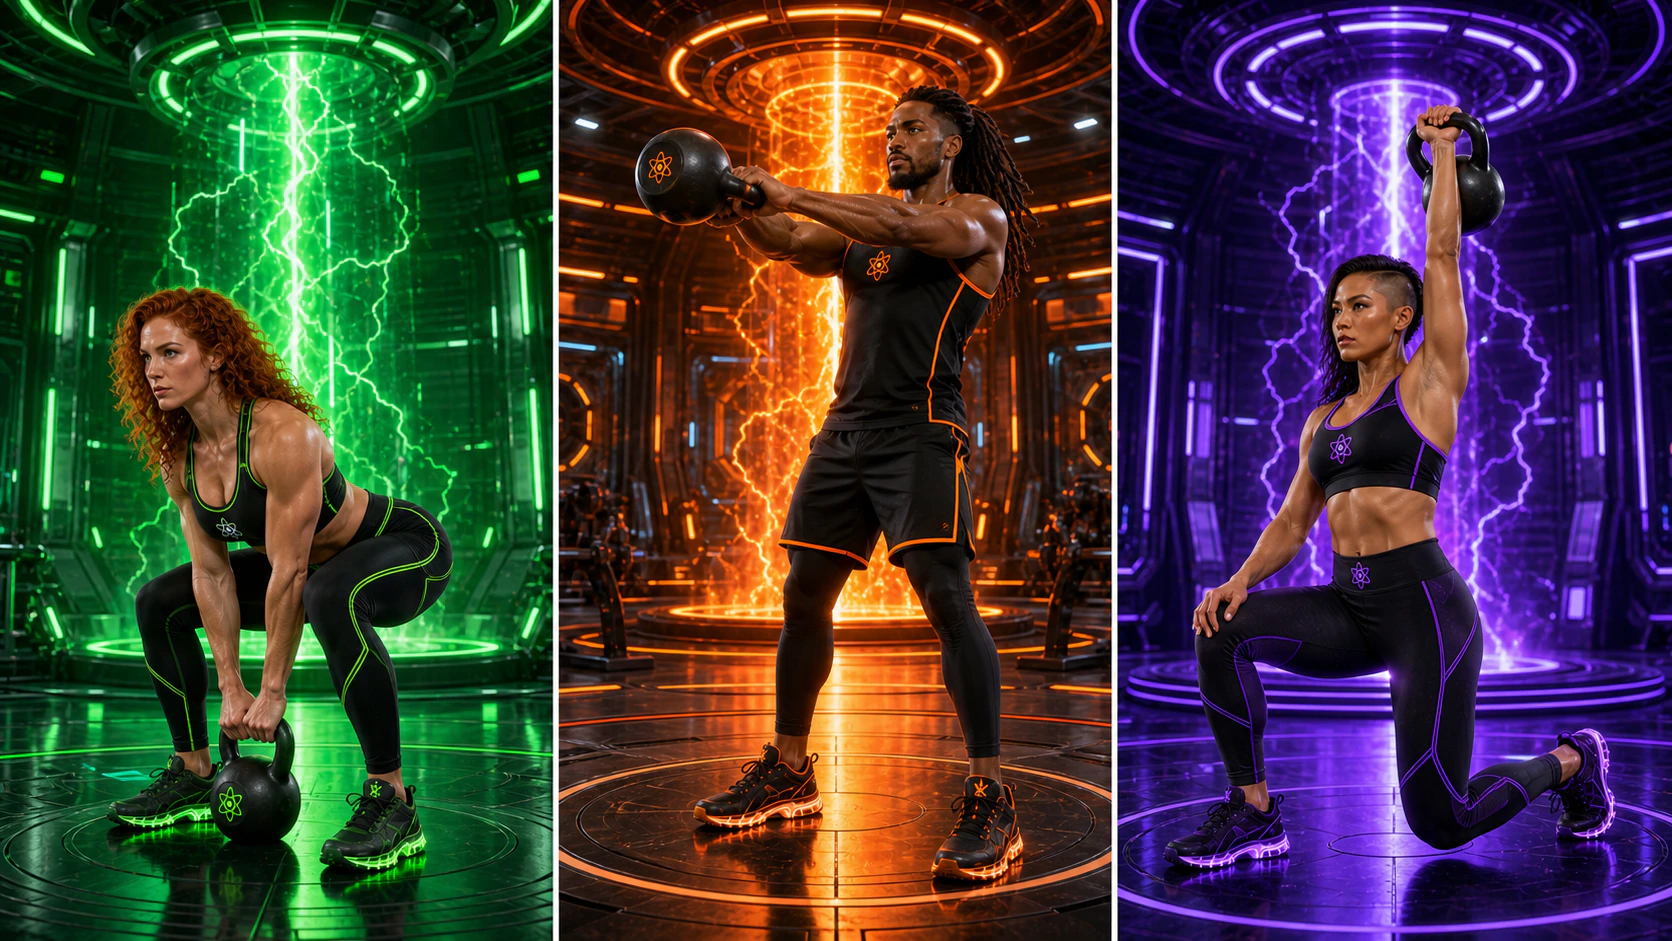
Three unique AtomicBod superheroes demonstrating a kettlebell deadlift, two-hand swing, and half-kneeling kettlebell press
Illustrated movement panelKettlebell deadlift · Two-hand kettlebell swing · Half-kneeling kettlebell press
10.1
Hinge foundation · Kettlebell

Kettlebell deadlift

Set
Stand with the bell centered between the feet. Push the hips back, bend the knees enough to reach the handle, brace, and grip with both hands while keeping a long spine.
Move
Drive the floor away and stand by extending knees and hips together. Finish tall without leaning back, then hinge and guide the bell to the same spot.
Breathe
Inhale and brace before lifting; exhale after passing the hardest point.
Avoid

Squatting straight down, rounding, lifting with the arms, letting the bell drift forward, or hyperextending at the top.

Scale the movement +

Easier: Raise the bell on a stable block.

Harder: Use a heavier bell only when every repetition returns to the same position.

10.2
Explosive hip hinge · Kettlebell

Two-hand kettlebell swing

Set
Place the bell slightly ahead of the feet. Hinge to grip it with both hands, brace, and hike it high between the thighs while keeping the shoulders above the hips.
Move
Snap the hips forward to float the bell to about chest height. Let gravity return it, hinge late, and keep the arms acting as guides rather than lifting the bell.
Breathe
Use a sharp exhale as the hips extend and inhale as the bell returns.
Avoid

Turning it into a squat or front raise, lifting overhead, rounding, hyperextending, loose grip, or continuing after timing breaks down.

Scale the movement +

Easier: Master kettlebell deadlifts and short hike-pass drills first.

Harder: Increase bell size gradually while preserving a crisp hinge and neutral finish.

10.3
Vertical press + trunk · Kettlebell + mat

Half-kneeling kettlebell press

Set
Kneel with one knee down and the opposite foot forward. Hold the bell at the shoulder on the kneeling side, wrist neutral, forearm vertical, glutes engaged, and ribs stacked.
Move
Press the bell overhead until the arm is comfortably stacked above the shoulder. Keep the trunk still, then lower slowly to the rack position.
Breathe
Inhale and brace before pressing; exhale as the bell passes the hardest point.
Avoid

Leaning sideways, flaring the ribs, bending the wrist, letting the bell pull the elbow away, or forcing painful overhead range.

Scale the movement +

Easier: Use a light dumbbell or landmine press.

Harder: Add a pause overhead or progress to a standing single-arm press.

Biceps + triceps

Arm isolation works best when the upper arm and torso stay quiet. Use a complete controlled range instead of moving a heavier weight with the shoulders and lower back.
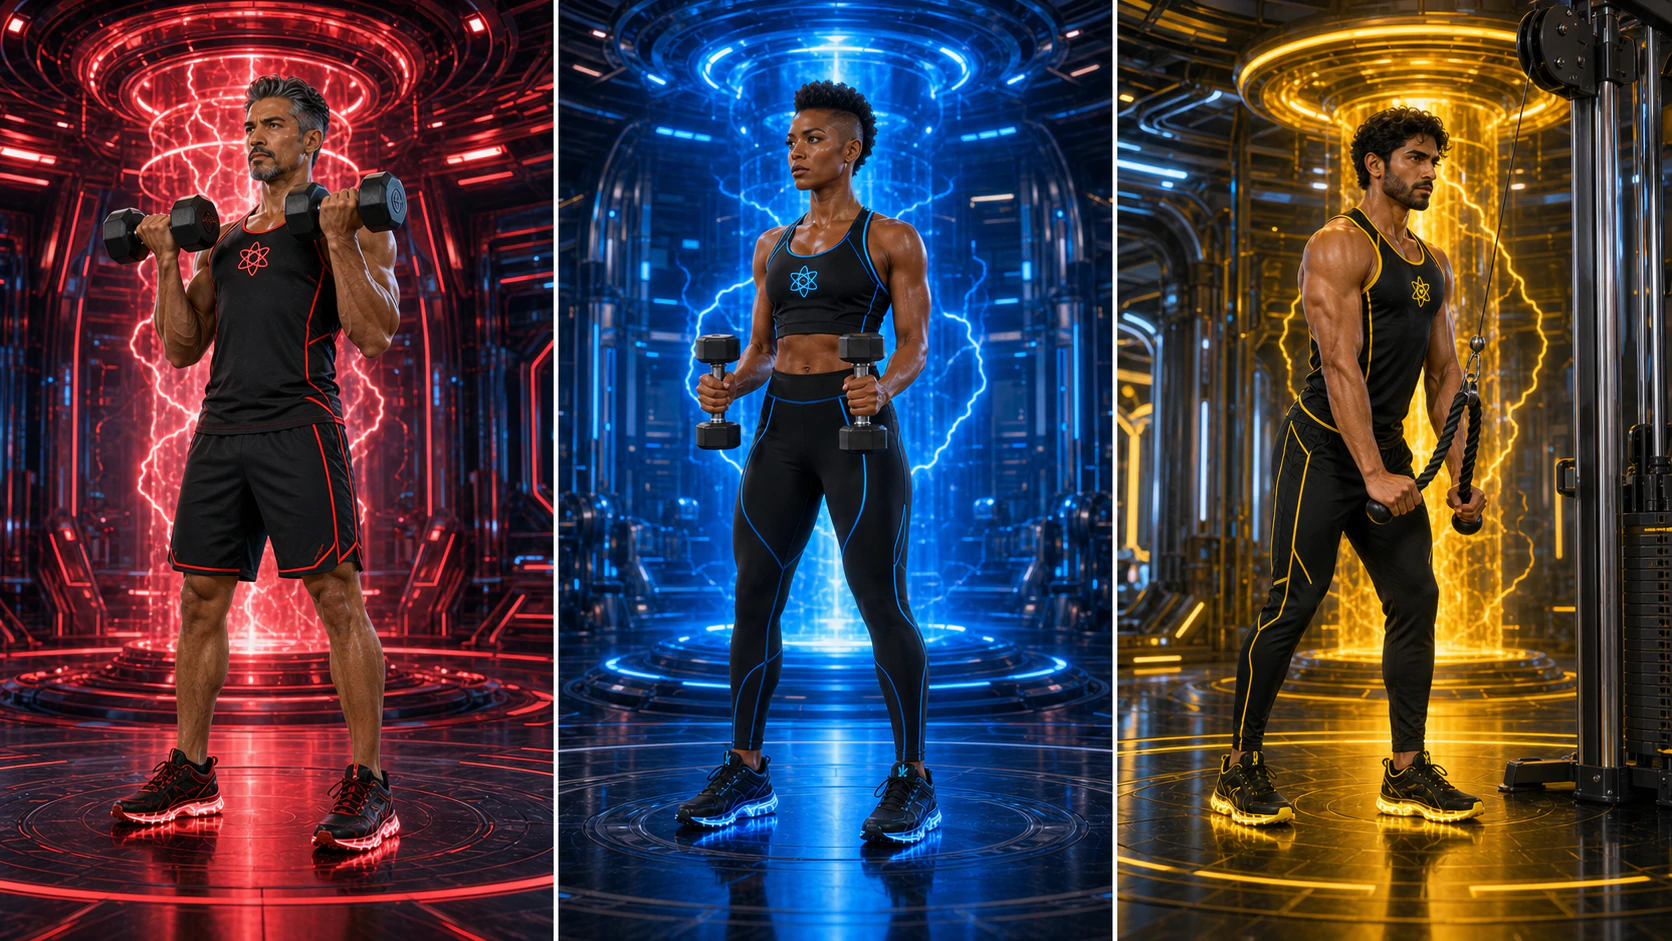
Three unique AtomicBod superheroes demonstrating a dumbbell biceps curl, hammer curl, and rope triceps pressdown
Illustrated movement panelDumbbell biceps curl · Hammer curl · Rope triceps pressdown
11.1
Supinated curl · Dumbbells

Dumbbell biceps curl

Set
Stand tall with feet stable, dumbbells beside the thighs, palms forward, elbows close to the ribs, wrists neutral, and shoulders relaxed.
Move
Bend the elbows to lift the dumbbells without letting the upper arms drift forward. Squeeze briefly, then lower to long arms under control.
Breathe
Exhale while curling; inhale while lowering.
Avoid

Swinging, leaning back, shrugging, bending the wrists, driving elbows forward, or dropping the weights through the return.

Scale the movement +

Easier: Curl seated with lighter weights or alternate arms.

Harder: Use a slower lowering phase before adding load.

11.2
Biceps + forearms · Dumbbells

Hammer curl

Set
Stand or sit tall with palms facing inward, thumbs forward, wrists straight, shoulders down, and elbows aligned beside the torso.
Move
Curl the weights toward the shoulders while preserving the neutral grip. Stop before the elbows travel forward, then lower slowly.
Breathe
Exhale as the weights rise; inhale as they lower.
Avoid

Rocking the torso, shrugging, flexing the wrists, flaring the elbows, or shortening the bottom range.

Scale the movement +

Easier: Alternate arms or use a supported seated position.

Harder: Add a pause near 90 degrees or use a controlled cross-body variation.

11.3
Elbow extension · Cable + rope

Rope triceps pressdown

Set
Set the rope above head height. Stand tall with knees soft, elbows pinned near the ribs, wrists neutral, shoulders down, and torso braced.
Move
Straighten the elbows and separate the rope ends slightly near the thighs. Keep the upper arms still, then return until the forearms rise without shoulders moving forward.
Breathe
Exhale as the elbows straighten; inhale during the controlled return.
Avoid

Leaning bodyweight onto the rope, flaring elbows, bending wrists, shrugging, or letting the stack pull the shoulders forward.

Scale the movement +

Easier: Use lighter resistance or a straight bar with a comfortable grip.

Harder: Pause at full extension before increasing resistance.

Cross-training power

Box jumps, wall-ball shots, and burpees are common in CrossFit-style conditioning. Learn each piece fresh, scale the impact, and stop the set before fatigue changes the movement.
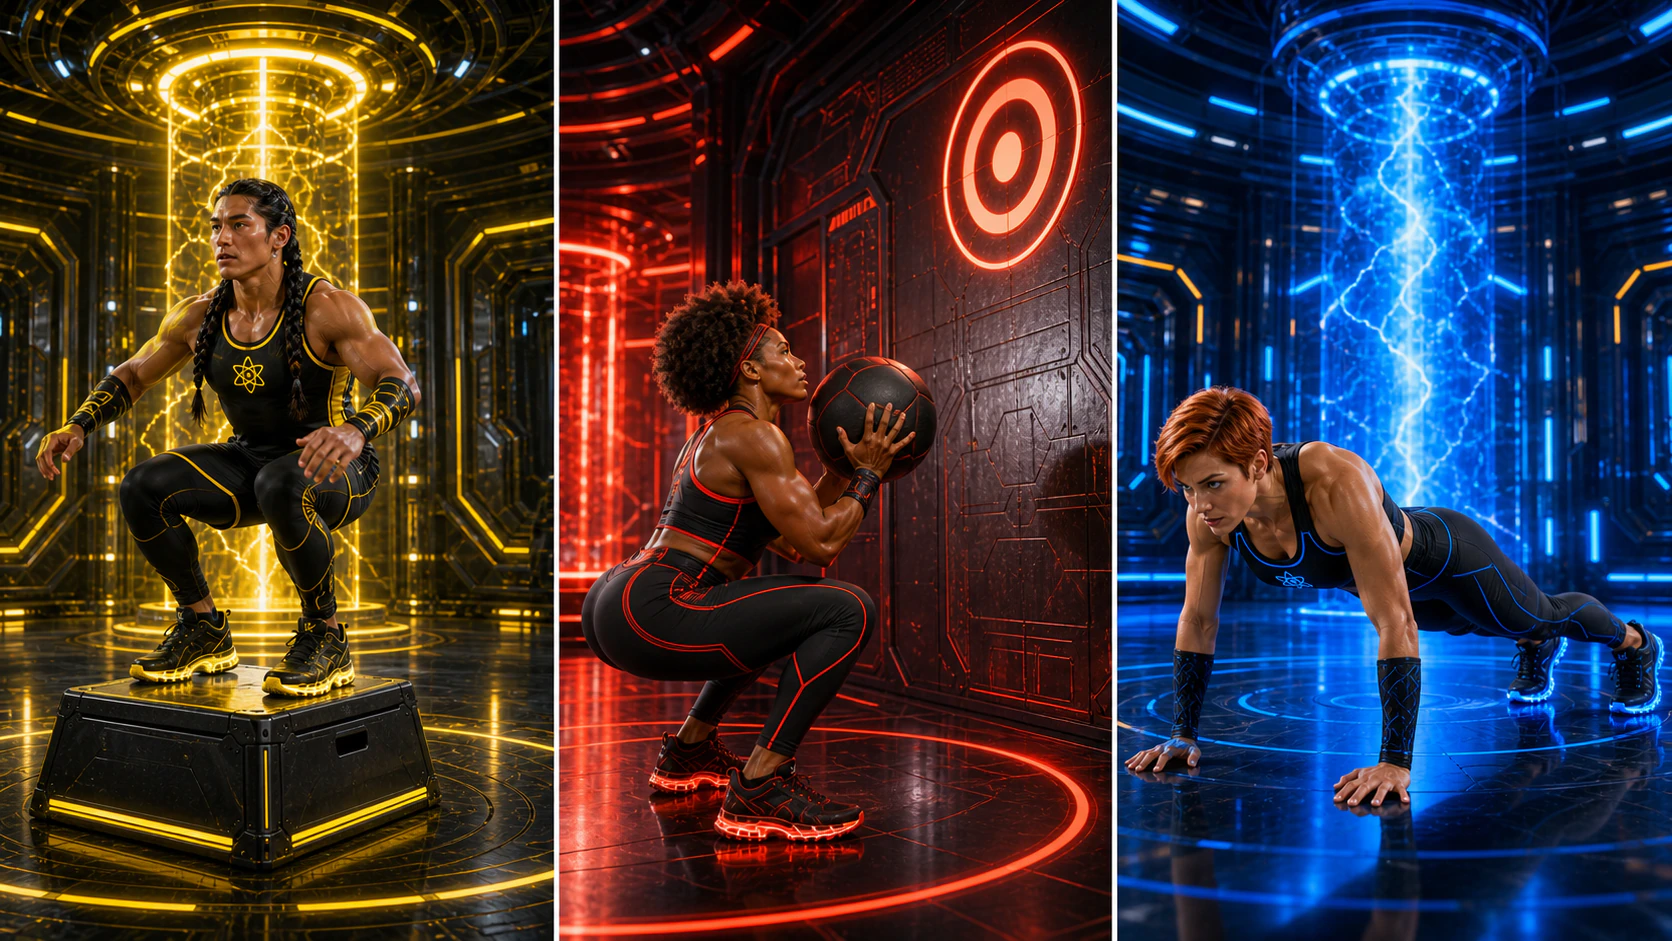
Three unique AtomicBod superheroes demonstrating a box jump, medicine-ball wall target throw, and burpee
Illustrated movement panelBox jump · Medicine-ball wall target · Burpee
12.1
Landing + lower-body power · Stable plyometric box

Box jump

Set
Choose a low non-slip box you can clear comfortably. Stand about one foot-length away with feet under the hips, knees soft, and the landing area unobstructed.
Move
Dip through the hips and knees, swing the arms, and jump onto the box. Land softly with both feet fully supported and knees tracking over toes; stand tall, then step down carefully.
Breathe
Exhale during takeoff; reset breathing before the next repetition.
Avoid

A box that is too high, knees collapsing, heels hanging off, landing in a deep uncontrolled squat, rebounding down, or jumping when fatigued.

Scale the movement +

Easier: Use fast step-ups or a very low box.

Harder: Add height only after quiet, consistent landings; never trade control for speed.

12.2
Squat-to-throw power · Medicine ball + wall target

Medicine-ball wall target

Set
Face a sturdy wall at a distance that lets the ball travel nearly vertical. Hold a light ball at the chest, set feet in a comfortable squat stance, and keep the whole foot grounded.
Move
Squat with knees tracking over toes, then drive through the legs and extend the arms to send the ball toward the target. Receive it softly at the chest and absorb the return into the next controlled squat.
Breathe
Exhale with the throw; inhale and brace as the ball returns.
Avoid

Using a ball that is too heavy, catching with locked elbows, heels lifting, knees collapsing, hyperextending the back, or chasing a falling ball out of position.

Scale the movement +

Easier: Use a lighter ball, lower target, or squat-to-press without releasing it.

Harder: Increase target height or pace only while every catch and squat remains stable.

12.3
Total-body conditioning · Floor

Burpee

Set
Stand with clear floor space. Choose a full, step-back, or elevated-hand version that lets you keep control through the trunk and shoulders.
Move
Squat and place the hands down, step or jump to a stable plank, lower only through a controlled range, return the feet beneath the body, then stand or make a small vertical jump.
Breathe
Exhale during the return to standing; use a repeatable rhythm rather than holding the breath.
Avoid

Sagging through the plank, elbows flaring, feet landing too narrow, knees collapsing, uncontrolled chest contact, or racing after coordination fails.

Scale the movement +

Easier: Place hands on a bench and step one foot back at a time without jumping.

Harder: Add a controlled push-up or low box jump only after the base burpee stays crisp.

Form improves with feedback.

Use the complete exercise library on this page to understand each movement, let Atomic Coach organize the right exercises around your goal and available days, then have an AtomicBod trainer observe your reps when pain, heavy loading, complex equipment, or a performance goal raises the stakes.

Technique. Coaching. Progress.

Ready to train with a plan built around you?

Tell Atomic Coach your goal, experience, equipment, available time, and preferred training days. Your matched exercises become a flexible weekly workout board in My AtomicBod.

General education only, not medical advice, diagnosis, rehabilitation, or an individualized training plan. Generated superhero artwork is illustrative and cannot replace live coaching. Stop any exercise that causes sharp pain, loss of control, faintness, chest pain, or unusual severe shortness of breath, and seek appropriate professional care.